Showing posts with label food. Show all posts

Wednesday, 22 May 2013

A Public Place to Hide


It's nice to have quiet time in a crowded restaurant.  

If you've never dined alone, you're missing out. It can be a little bit scary to begin with, but if you take a book (or have good games on your cellphone) it can be lovely to sit somewhere warm, have someone bring you food, and just enjoy the time to think your own thoughts and people watch.  My favorite place to go is a Thai restaurant close to work, and I usually go there on days when I think I'm getting sick. Don't worry, I'm not a psycho bent on spreading my germs to unsuspecting folk - but I am convinced that a steaming bowl of spicy tom yum soup can stop a cold in its tracks. Today was no exception. I'd been battling a sore throat all morning, but I swear all that chilli and lemongrass cleared any lurking virus away before it could take hold!

I am naturally someone who likes spending time alone, doing something crafty, or reading. Don't get me wrong, I absolutely love my friends and going out to parties etc, but if I had to choose I would usually rather stay tucked up at home.  So sometimes a public yet solitary experience can be quite enjoyable - you get to go out and do something fun, but you can make all the choices about what you do, and you can go home to bed whenever you want!  I really want to try going to a movie alone, which I'm sure would be easier than a restaurant, but somehow I think I would feel creepy. Depends on the movie I suppose....

Sunday, 19 May 2013

Something Nice To Look At If, Like Me, You're Feeling Lethargic


I'm a bit poorly today.  I didn't overindulge on the gin too much, but it was definitely a late night and I really need my sleep. Despite a sleep in I'm still a bit jaded and have the shades of a hangover blurring the edges of my senses. Strong sweet coffee and food high in carbs usually help, but for me, looking at pretty things seems to counteract the feeling-sorry-for-self that comes with the morning after.  So today's post is full of things that are just nice to look at. Plus if I do a blog post then I've done at least one productive thing and I don't feel so guilty about lazing around all day.

So settle in by the fire with a cuppa and enjoy my selection of nice things.


While Nightingales Wept: a model captured running though the woods near Kirsty's home
This stunning photo project with a beautiful back-story
Sweet & Salty Layer Cake via Sweetapolita
This Salted Chocolate Caramel Fudge Cake. Oh my.
eggs & bacon
emily blincoe
This delicious ampersand photography project
Last of the wintery weekend sun. #winter #wintersun #socks #willow #window #sunshine
My talented friend Julia captures exactly how I feel today
Tree Houses. Fairy Tale Castles in the Air
This treehouse surrounded by cherry blossom (Photograph copyright Akihisa Masuda)
My friend Heather cooks this dumpling soup to remedy a cold, but it looks so good, I'm sure it could cure a hangover too!


These pictures have definitely helped me feel better, but I'm also super hungry now...I'm off to rustle up something delicious.

Sunday, 21 April 2013

TRUST ME, It's Delicious (Mexican Style Breakfast)

This is my new favourite breakfast and it only takes about 10-15 mins to whip up.  It's based  on this Mexican breakfast recipe, but is simplified to cut down the time required.  I love this breakfast because it's very adaptable and you can easily make it for more than one person.  I tend not to use chilli because it can be harsh on the stomach early in the morning, but to be closer to Mexican you definitely should try a spicier version.

Mexican Style Breakfast - Serves 1

Ingredients:
1 egg
1/4 medium red onion
1/2 tomato
1/8 yellow capsicum
1tsp oil or butter (or both - it's tastier and the oil stops the butter burning)
Salt and pepper to taste


Heat a pan on the stove top on a medium heat.
Chop the veges finely, add the oil/butter to the pan and then add your vegetables.
Let them cook, stirring occasionally until the onions are softened but not starting to brown.
Arrange the veges in a circle in the pan, with roughly 12-15cm diameter, and an even thickness.
Crack the egg over the top (being careful not to break the yolk) and let the white run down through all the veges - you can give it a gentle push before it sets to ensure it's around the edges of the vegetables. 
Turn the heat down ever so slightly (I put mine down from 3/6 to 2.5/6) and cover the whole thing with a large pot lid that doesn't touch any of the ingredients.
Leave for a couple of minutes until the edges of the egg are slightly crisp and the rest is cooked but the yolk is runny.
Now for the trickiest part - if you have a non-stick pan you'll probably be fine, but I don't so it's always a risky game for me!
Use a fish-slice to gently lift up your creation to serve the whole thing in one piece. My final photo is a "what not to do", but that is the risk of taking photos of actual meals and not having the chance to do them over!
Season to taste and enjoy with a strong coffee.


Tips (or What Not To Do That I Have Obviously Done This Time):
  • Use a greater ratio of other vegetables to tomato.  The tomato tends to break down and is not conducive to a well-set dish
  • It's important that there is a reasonable amount of egg around the edges of the vegetable disc, so the egg can set around them and it will be easier to remove from the pan.  If you look at my end photo you will see that I made this exact mistake
  • Don't add salt until the end - it will draw water out of the tomatoes and make your dish too mushy otherwise

Serving suggestions:
  • Top with sliced avocado, crumbled feta and coriander
  • Break the yolk and put in a few drops of hot sauce or Worctershire sauce 
  • You could add one or all of the following to your vegetables - chopped chilli, coriander, finely sliced bacon
  • Serve on top of a warmed flour tortilla
  • Serve as part of a brunch meal with toast, bacon, sausages etc
  • Make a larger portion by increasing your vege amount and just cracking all your eggs over the whole lot.
This breakfast is simple, fresh and so tasty - once you've tried this you'll never want boring cereal again.

Enjoy!
Hot mess

Wednesday, 27 March 2013

TRUST Me, It's Delicious (Chicken Marbella)

Source
Even though I'm not the most skilled cook, I love food a lot. A. Lot. There's nothing I won't try, and I usually get excited about the next meal before the current one is even finished. Going out for a dinner is great, but I especially love home-cooking and baking. Add the overwhelming joy I get from food to the fact that I watch a lot of FoodTV (and read lots of foody blogs), and you've got yourself one inspired and hungry girl.  So this post series will feature a new recipe I've tried at some stage during the month.  I'm really looking forward to doing this feature - new food experiences just make life a whole lot more interesting and beautiful.

This first recipe is not brand new to me but it is one of my most recent favourites.  The original recipe comes from The Silver Palate cookbook which was written in the early 80's.  Despite the longish list of ingredients the recipe is incredibly simple.  Don't be put off by the combination of ingredients either - by the time it's done, everything will have cooked down together to make a fantastic savoury sauce with just the right amount of sweet and sharp flavours to balance it out.

Please try it just once, it really is delicious and not naff at all for an 80's dish!

Chicken Marbella adapted from The Silver Palate cookbook

8-10 chicken pieces - thighs & breasts, bone in - remove skin if you prefer
1/2 head of garlic, peeled and finely puréed (or grated on the fine part of your cheese grater)
2 Tbsp of fresh oregano OR 1 Tbsp dried oregano
Coarse salt and freshly ground pepper to taste
1/4 cup red wine vinegar
1/4 cup olive oil
1/2 cup pitted prunes
8 large pitted Spanish green olives
1/4 cup capers with a bit of juice
3 bay leaves
1/4 cup brown sugar
1/2 cup white wine
2 Tbsp fresh Italian parsley or coriander, finely chopped (optional)

In a large bowl combine garlic, oregano, salt and pepper to taste, vinegar, olive oil, prunes, olives, capers with caper juice, and bay leaves. Add the chicken pieces and coat completely with the marinade. Cover and let marinate, refrigerated, several hours or overnight.
Preheat oven to 180°C. Arrange chicken in a single layer in one or two large, shallow baking pans and spoon marinade over it evenly. Sprinkle chicken pieces with brown sugar and pour white wine around them.
Bake for 50 minutes to 1 hour, basting frequently with the pan juices. Chicken is done when thigh pieces, pricked with a fork at their thickest point, yield clear juice (not pink).
Transfer chicken, prunes, olives, and capers to a serving platter. Add some of the pan juices and sprinkle generously with parsley or coriander. Serve remaining juice in a gravy boat.
Serves 5-8
My serving suggestions and tips:
- You can make this meal to serve 2 (with leftovers to spare), just halve all the ingredients
- Sides that go well with that delicious sauce: potato mash and wilted spinach, or crusty baguette and green salad
- Chicken thighs can be used as a substitute, if they are boneless you can roll the marinade mixture inside just before cooking (don't forget to remove the bay leaves!)
- I tend to finely chop all my olives and prunes, that way the marinade goes further, and      melts down into a much more integrated sauce when cooked. 
- You may have to buy a few ingredients to start, but most of them last for ages so it's worth the initial purchase

Enjoy!

PS I didn't take my own pics because I forgot and ate it all.

Tuesday, 3 July 2012

I'm Pretty Sure I Definitely Need This


Not only do I love shopping for clothes (new and vintage), but I am currently renovating my house, so am always on the lookout for cool appliances and decor ideas.  This feature is just so I can share what I'm currently drooling over, whether it's something I can afford or not!  I'll probably include the occasional craft idea too, because I love the idea of having original pieces in my home that truly reflect my personality and style.

The first item on my wish list is a kitchen mixer, something I've wanted for AGES but will probably never be able to afford new!  So I'm constantly on the hunt for a vintage model in good working order.  Who knows though, fingers crossed I can one day afford a brand new one of these babies - they come in customised colours named after foods like Mint, Cupcake and Lemon Meringue, so I was hooked from the very beginning! Let's just say I'm pretty much in love.


Of course, I'm still holding out hope that I'll miraculously stumble across one of these, and then I can get the whole thing spraypainted in the colour of my choice....I'm sending the request out to the universe as I type...

Saturday, 23 June 2012

TRUST Me, It's Delicious (PB & J French Toast)

Welcome to my second monthly feature, which is all about foooood. Brilliant.  I think about food a lot and it's one of the things that brings the most joy to me, hence the title of the post! I know I'm not the only person like this so I really hope this feature is enjoyed by lots of people! 

Now this "recipe" is almost too embarassing to post about, but it was so delicious that I don't care. And I know I'm not the only person that would enjoy this.   It's PB & J French Toast. Yep.  Just like regular peanut butter and jam on toast but fatter and approximately 5% fancier.  

Don't judge me. I know you'd try it! Also....I'm no food photographer so it tastes better than it looks...


PB & J French Toast
Ingredients:
2 pieces bread of your choice (slightly stale is better as it will soak up more eggy mixture) 
1 Tablespoon crunchy peanut butter 
1 Tablespoon jam of any flavour (I used three-berry)
1 egg
1/4 cup milk (fatty is better but trim works just as well)
1/2 teaspoon vanilla essence
1/4 teaspoon cinnamon (optional)
Pinch of salt 
Butter (or oil)
Icing sugar 

Method:
Heat a frying pan on medium heat. Spread the bread with the peanut butter and make a sandwich.  Thoroughly mix the egg, milk, vanilla and salt in a shallow dish.  Gently place the sandwich in the egg mixture and soak for a few seconds until soaked in.  Turn the sandwich over so both sides are thoroughly coated. Don't leave it in too long or it will become too soggy and fall apart.

In the heated pan, melt a teaspoon of butter and place your eggy sandwich in (the pan should be hot enough so the sandwich gently sizzles).  Cook on one side until nice and golden, then carefully turn and cook the same on the other side.

While the toast is cooking, heat your jam in a small dish in the microwave for approximately 20 seconds so it turns to liquid.  You can also add a tablespoon of water before you do this to make the jam really runny.  I sieved my jam to get the seeds and lumps out.

To serve:  Place your cooked french toast on a plate, cut in half and dust with icing sugar. Drizzle your jam over and eat up.  Really good with strong hot coffee, on a wintry Saturday morning, with the telly on and still wearing your PJs...trust me. 

x

Tuesday, 12 June 2012

It's The Thought That Counts

As usual I've let my blog slide, but I'm once again feeling inspired and ready to get back to posting regularly. Really this time... I've got lots of ideas for regular features which will hopefully keep me on track, and the winter weather is conducive to snuggling up doing crafty/bloggy things anyway.

ANYWAY, I realised that I've had this blog for over a year now, and didn't even celebrate my "birthday" way back in April. Hence the pictures of delicious cake. 

Happy late blog birthday to me, and here's to many more to come!

 1, 2, 3, 4.


Sunday, 1 April 2012

SUNday

The most fun part of DIY - smashing stuff down
Another vintage wallpaper discovery...
Found inside the wall!
Finished fence - yay!


Oh I love you too, garden!
Our own lettuce, mint, AND tomatoes...I'm so proud!
Wow. This weekend has just been amazing. The weather was not only gorgeous but WARM as well, and it's brought out the best of everyone in our household! We've been very productive - smashing things down, building more things, doing washing, gardening, drinking lots of wine with lovely girlfriends (that was me) and trying out new recipes to create delicious food using produce from our garden.  I even managed to sneak in a laze on the couch with Food TV - bliss.

There's a lot to be said for being incredibly but pleasantly tired, and knowing you've made the most of your precious weekend time.  Can't wait for next weekend....Easter, 4 days off!  Fingers crossed the weather will be just as stunning.

Monday, 13 February 2012

Green Thumbs Up


Oops. I haven't done this in ages.  It's not that I haven't been inspired, just busy. Plus I forget my camera a lot and think "this would make a great post, where's my - oh".  No matter, I'm here now!  Some of the things I do remember to photograph are the veges, fruit and herbs from my little garden. I love my garden!  We only just started growing things before the summer but we've had so much from it, for so little effort.  There's such a sense of satisfaction that comes from growing veges - it's easy, cheap, healthy and most of all - delicious! Plus I actually like doing the weeding and watering because it makes me spend time outside. 

I'm hoping there will be enough sun to ripen my tomatoes, but if not, I think some green tomato chutney will be on the agenda. Which will make a great post if I remember to photograph it.....

Tuesday, 12 July 2011

Cake


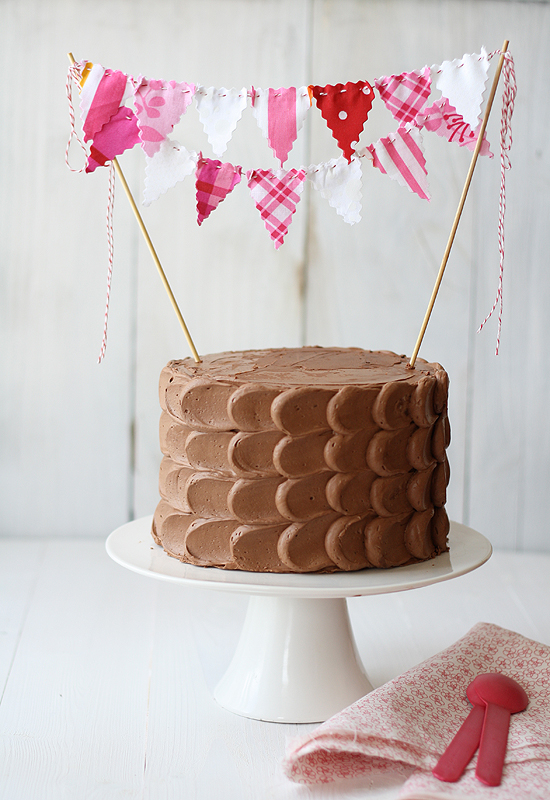
Given how much I like my food, it’s surprising that I still haven’t done a food related post.  I watch the Food channel a lot, and I especially love baking and dessert related shows like Ace of Cakes…mmmm…cake.  I would say I have more of a salt tooth than sweet, but I like making sweet treats more because they seem to make other people so happy!  As I said last time, one of my favourite things to do in the winter is bake, and I usually find time to make something on the weekend.  There’s something really comforting about baking – it’s generally pretty easy, and at the end of the day, anything is bound to taste good with enough butter and sugar!

If you’re not a confident baker you should still try the recipe below, you can basically make it in one bowl and it will only take about 15 minutes to prepare (with about 20-25 minutes baking time).  Plus it's super adaptable (see variant suggestions at the bottom).  Enjoy!

CHOCOLATE BROWNIE

Ingredients:

150g butter
¾ cup cocoa powder
1 ¼ cups sugar
3 eggs
½ cup flour
½ tsp baking powder
Few grinds of salt (optional)
Oil spray/baking paper

Method:

1. Preheat oven to 170°C.
2. Chop 150g butter into large cubes and melt. Either do this on low heat on the stovetop, watching carefully and stirring often OR in microwave on medium heat, 20 seconds at a time.
3. Stir ¾ cup pure cocoa powder into the melted butter until there are no lumps and it resembles velvety melted chocolate.  DON’T taste it. Trust me.
4. In a large mixing bowl, pour 1¼ cups sugar and 3 eggs. Beat with a hand beater or an electric one until pale and quite fluffy.
5. Add the cocoa/butter mixture to the larger bowl and gently fold through until everything is just combined.
6. Sift in ½ cup of plain flour and the ½ teaspoon baking powder. Fold through again until just combined.
7. Optional:  Add ¼ tsp or a few grinds of salt.  This sounds weird but makes the chocolate flavour way more delicious.  Just make sure you mix this in thoroughly!
8. Line a shallow brownie tin (approx 20cm square by 4cm high) with baking paper, or spray with oil.
9. Pour mixture in and spread flat with a spatula.
10. Bake in oven for approximately 20-25minutes or until a knife/skewer comes out  cleanly and the brownie no longer wobbles when you shake the tin gently.

Leave to cool before turning out (otherwise the brownie will fall to pieces and that would be a tragedy).

I recommend keeping in an airtight container and only cutting off pieces as you eat them.  Cutting it all up at once means that it can go stale more quickly.

Enjoy, and if you feel adventurous try adding some (or all!)of these to the completed plain brownie mixture:

Nuts:  I highly recommend a big tablespoon of crunchy peanut butter and some roasted peanuts, but macadamias are really good too.

Chocolate chunks: Whatever your favourite chocolate is...white chocolate is good!

Coffee:  Dilute 2 tsp of instant coffee in 2 tsp of hot water. Add to the plain brownie mix.  This amount won’t make the brownie taste like coffee, but it will intensify the chocolate to a dark chocolate flavour brownie.  I do this one nearly every time.

Alcohol: Try adding a couple of teaspoons of bourbon. (Chocolate chunks with this would be awesome too) YUM.

 Last but not least...add spoonfuls of soft pre-made caramel (eg Highlander Caramel) as a middle layer to the brownie and on top before cooking.